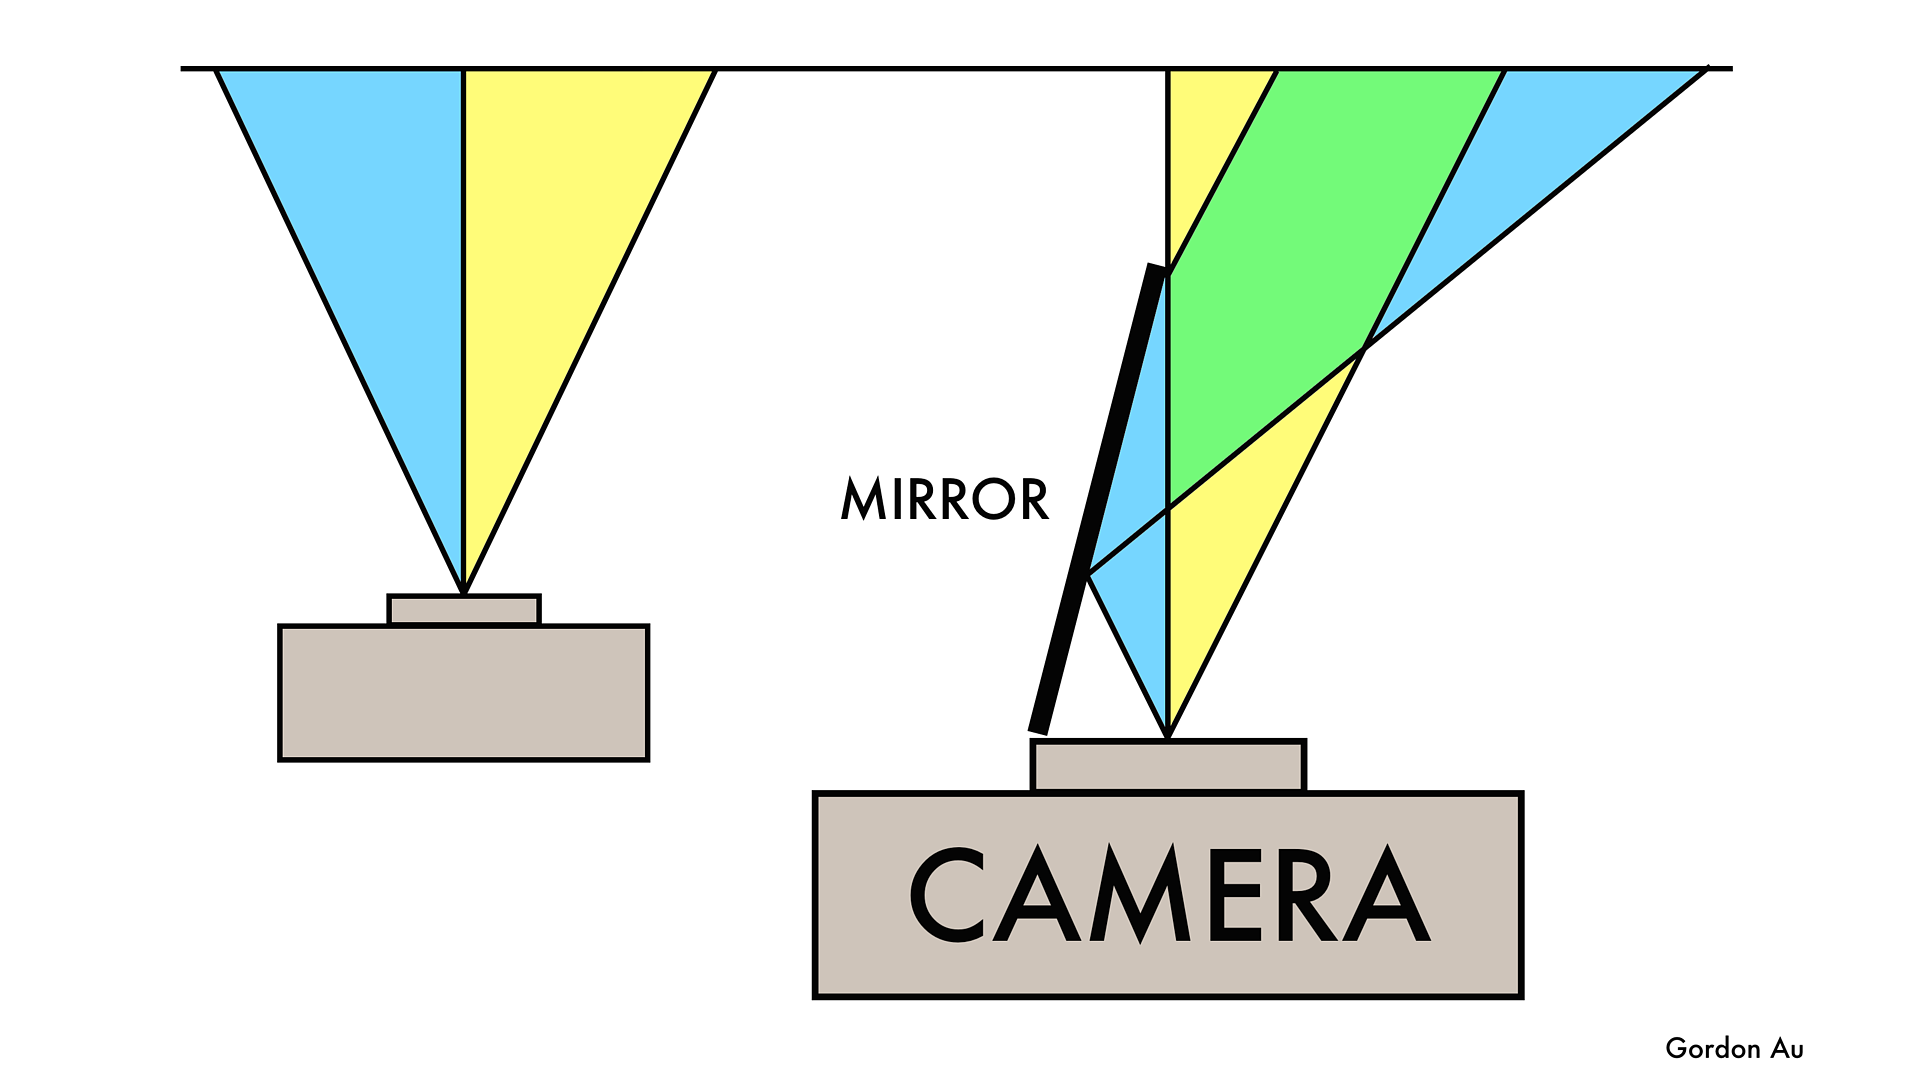
 This figure shows the basic principle: the mirror reflects one half of the camera’s view (in blue) over to the opposite side, where it overlaps with the other half view (in yellow). For everything in the green overlap area, you get 2 different views—stereopair potential! Technically, a system that combines a mirror and lens like this is called catadioptric.
[UPDATE: You can also build a DIY catadioptric rig quite easily and cheaply.]
You can do this on either side—whichever is more comfortable. The setup should look something like below left, and your raw picture should look like below right:
When you start out, you will need to fine-tune the mirror position and tilt. I recommend taking a series of test shots, using the same subject (at ~1-2 mirror lengths away), and with different combinations of mirror positions and tilts:
Shot #1: mirror 0mm from lens edge / 40% of view reflected
Shot #2: mirror 0mm from lens edge / 50% of view reflected
Shot #3: mirror 0mm from lens edge / 60% of view reflected
Shot #4: mirror 3mm from lens edge / 40% of view reflected
Shot #5: mirror 3mm from lens edge / 50% of view reflected
Shot #6: mirror 3mm from lens edge / 60% of view reflected
Shot #7: mirror 6mm from lens edge / 40% of view reflected
(And so on…)
[This will also apply to calibrating a DIY rig.]
To process the shots, simply:
After processing, go back to your notes, and see which combination of mirror position and tilt worked the best. (What amount of depth do you prefer? Which stereopairs turn out the cleanest?) You might want to follow up with more test shots of subjects at different distances.
Beyond ‘getting started,’ there are further details worth discussing about mirror stereos, including the ideal mirror (size; shape; type: a front surface mirror, aka first surface mirror, which you can find on Ebay), precise processing (cropping, matching size and focus, correcting for keystone distortion), history and theory, and more. Learn about some of these in DIY Catadioptric Stereos, a video tutorial I made for the National Stereoscopic Association’s 3D-Con 2020. Also, check out the gallery accompanying this article on The Stereosite, and see #catadioptricstereo on Instagram for example shots.
Feel free to leave comments / send questions below. Have fun experimenting, and I look forward to seeing your mirror stereos!


TAGS: experiments > catadioptric stereos
?Subject=Mirror%20Stereos">Leave a comment